Shading
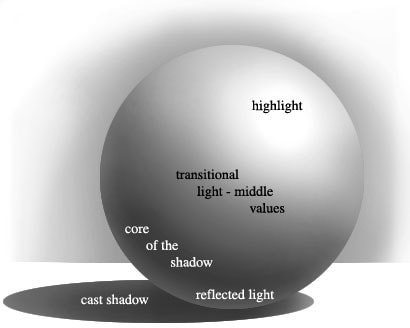
In order to use value in art, we must understand and practice shading. Shading is how we depict three-dimensional objects. It is created by adding different tones to a shape or object in order to identify the way light hits it. There are several aspects of light you will need to identify on the object - the highlight, the core shadow, the cast shadow, and the reflected light. Furthermore, you must identify the light source. The light source is the point from which the light is emanating. The highlight is where the light source is reflected off the object and seen by the viewer's eye. The core shadow is the darkest shadow on the object. This shadow usually develops where the light stops hitting the object, also know as the terminator line. The cast shadow is the darkness created on the surface or objects behind the object because it the object blocks the light. The reflected light is the slight lightening of the object below the core shadow created from light reflecting off the surface behind the object and bouncing back.
To shade an object follow the following steps:
- Identify the light source
- Look at the shape of the object
- Identify where the highlight will be on the object
- Identify where your terminator line will be - this is the point at which the light will no longer hit the object. For example, the sun only hits one side of the moon because the point at which the moon is the widest blocks the rest of the moon from receiving light. There will always be a point on a three-dimensional object that blocks the rest of the object from receiving light on one side. Cubes are somewhat easier because one side is already facing away from the light source. On round or curved objects, you must predict where the curve will reach it's farthest point so that the light is blocked from that point on. It is usually near the middle of the object at an angle perpendicular to the light source, but not always.
- Shade in the body tone of the object. This is usually a mid to upper (lighter) tone.
- Add the highlight either by removing the body tone in that area or not using the body tone in that area.
- Shade the core tone next. This will be the darkest tone you use on the object.
- Add your gradually lightening tones between the core shadow and your highlight.
- Add your gradually lightening tones between the core shadow and the reflected light. your reflected light should not be any lighter than your body tone.
- Add your cast shadow. This will resemble the shape of the object itself. You should be able to draw a straight line from the light source across the top of the object and down to where the shadow ends.
- The darkest portion of your shadow will be right below the object and gradually lighten.
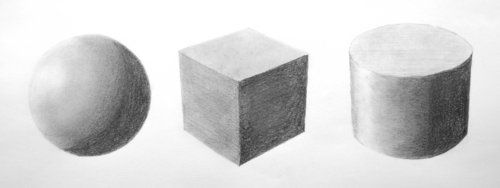
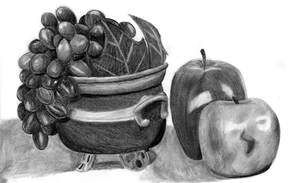
The shape of the object will also effect how the object is shaded. However, all shading relies on how and where the light is hitting the object. It helps to follow the outline of the object. For example, if the object is curved, make sure your shading follows the curve and is not straight across the object. Furthermore, cast shadows will mimic the shape of the object.
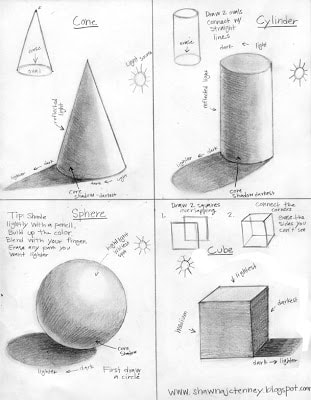
View the image below to see how different objects are shaded. It is a little hard to read, but you can see the full size image here.
View the image below to see how different objects are shaded. It is a little hard to read, but you can see the full size image here.
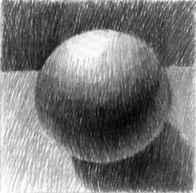
There are also different types of shading. There is standard shading, also known as blending, where it is smooth and without lines, like you've seen so far. The easiest way to create this type of shading is to use the side of your pencil lead to shade in a large area then use your finger or blending stump to smooth the tone out. The more graphite you put down in an area, the darker the tone. It is also sometimes called smudging. Here are a few examples:
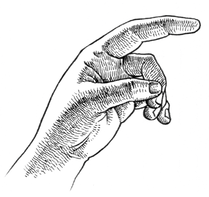
There are also hatching and cross-hatching. Both of these styles use lines to help create values. Hatching uses lines all in one direction to shade objects. The closer and more overlapping the lines are, the darker the tone. Making the lines thicker and thinner also effect how dark a tone you are creating. Here are a couple examples:
|
|
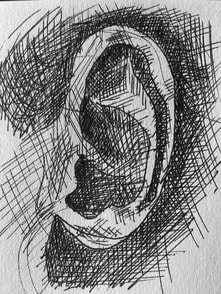
Cross-hatching uses perpendicular lines to shad objects. Like hatching, the more the lines cross, the closer they are, the more overlapping, and the thickness and thinness of the lines you use help to darken the tone that is being created, as well as . Here is are a couple examples:
|
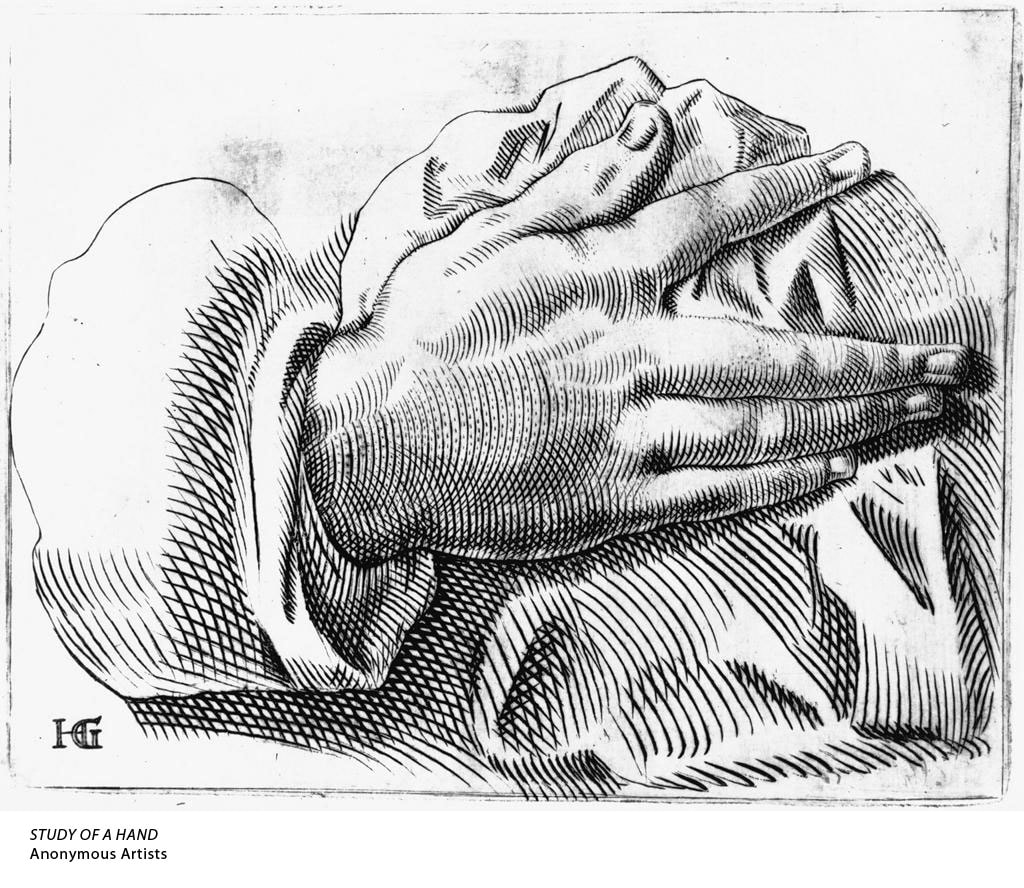
|
Finally there is stippling. Stippling is shading using dots. Dots closer together and more overlapping create darker tones. Here is an example:
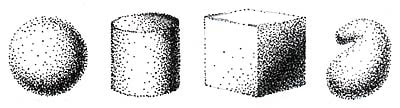
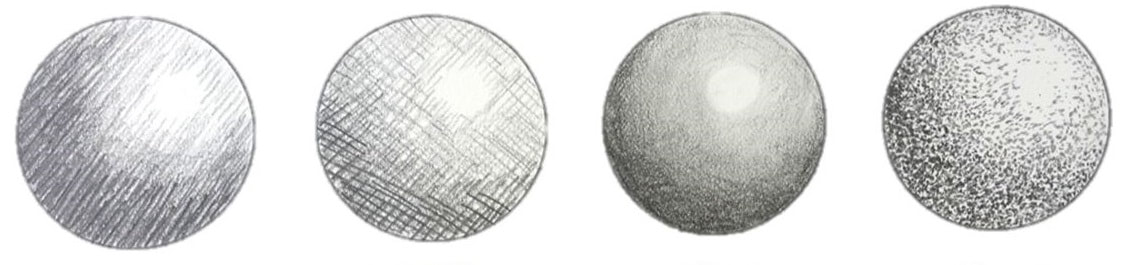
Now here are the four types next to each other on the same object. The image shows hatching, cross-hatching, blending, and then stippling.